
Room images are indicative
Shipping 6–8 working days
Wallpaper
·Italian landscapes ·SKU: GIA-1116598-wallpaper
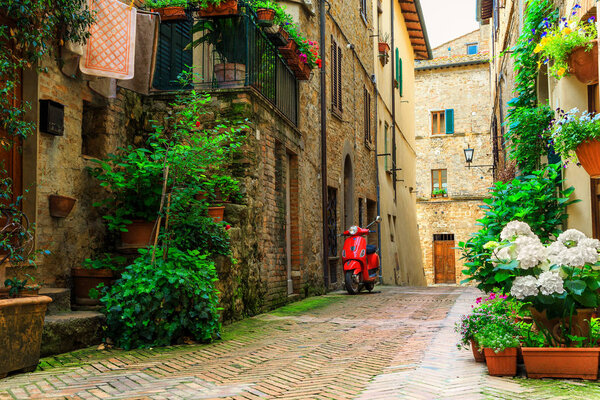
Pienza Tuscany Decorated Street
Charming narrow Tuscan street with a vintage scooter
–
Enter measurements to calculate
Price per m²
41,18 €33,75 € + VAT
1
Choose the textureselected -
2
Wall measurementsEntered
cm
cm
Minimum size 100×100 cm, maximum 500×500 cm.
3
![]()
Position the graphicConfirmed
Enter the measurements (step 2) to unlock
Graphic centred
This traditional street photography captures a narrow Italian lane, where ancient stone buildings are adorned with an abundance of potted plants and vibrant flowers. A vintage red scooter sits peacefully, lending a touch of authentic character to this picturesque rural scene. The tranquil alley evokes the timeless appeal of a Tuscan village, inviting quiet contemplation.
Product details
LineaWallpaper
CategoriaItalian landscapes
StampaSu misura al centimetro, inchiostri certificati
01
Prepare the wall
The wall must be clean, dry, smooth and free of dust, grease or old glue residue. On new or very absorbent plaster, apply a coat of primer and let it dry: a uniform base ensures optimal adhesion and colour rendering.
02
Check the panels and layout
Check the panels in good light and lay them out in numbered order. The panels arrive pre-cut with a safety margin on each side, so you can trim precisely once hung and match the pattern perfectly between panels.
03
Mark the plumb line
From the first corner, measure the panel width and draw a vertical reference line with a level (or a plumb line). Starting perfectly level is the step that keeps all the following panels straight and aligned.
04
Apply the glue or wet the panel
For traditional substrates, spread non-woven wallpaper paste directly on the wall, one section at a time, without excess at the edges. If you chose a pre-pasted substrate, no glue is needed: simply dampen the back of the panel (or the wall) with a damp sponge and wait a few moments for the adhesive to activate.
05
Hang it and match the pattern
Position the panel along the marked line, leaving a few centimetres of excess at the top and bottom. Match the pattern with the previous panel, then smooth from the centre outwards with the soft spatula to remove air bubbles and creases.
06
Trim and clean
With a sharp blade and a spatula as a guide, trim the excess along skirting boards, ceiling and corners. Immediately remove any glue residue with a clean, damp sponge before it dries. Let the wall dry without direct draughts.


